


The forecast said rain, so the camera stayed in the drawer. Most of us have made that call, and it is almost always the wrong one. Rain changes the world in ways a camera loves: surfaces go dark and glossy, colours deepen, streets empty out, and a flat grey sky becomes the largest softbox you will ever shoot under. What follows is a set of things worth pointing a lens at when the weather turns, plus the small habits that keep your gear dry and your pictures sharp.
Why grey days so often beat blue ones
Hard sunlight is difficult. It gives you black shadows and blown highlights in the same frame, and your camera can only hold so much of that range. Under cloud, the problem mostly disappears. Detail shows up where it usually hides: in faces, brickwork, the underside of leaves, the folds of a coat. You can photograph at midday and the result looks like late afternoon.
Then there is the water itself. Wet asphalt, stone, painted metal and car roofs all turn reflective, which effectively doubles the number of compositions on a single street. Water also darkens most materials, and darker usually means richer: a red door is redder when it is wet, a slate roof is bluer.
And people behave differently. They hurry, huddle, hold bags over their heads, wait in doorways. If you like photographing strangers, wet weather hands you gestures you will never catch on a dry Tuesday.
Start with the ground beneath you
Puddles are the most reliable rainy-day subject there is, and they are everywhere. The mistake is photographing them from standing height, where they read as grey smears. Get down. Kneel, crouch, or put the camera on the pavement if you have to.
Get low, then lower
At water level, a puddle stops being a puddle and becomes a window. A whole building fits inside a square metre of gutter. Try holding the camera a hand's width above the surface, tilting it slightly down, and filling two-thirds of the frame with reflection and one-third with the real thing. The line where wet meets dry gives you a natural horizon.
Read the reflection like a picture
Look for the interesting part rather than the whole. A single traffic light, a window with a lamp on, an umbrella passing, the tip of a spire. Ripples break the image into something abstract, which is often better than a perfect mirror. If the reflection looks stronger than the scene, turn the camera upside down and let the water be the sky.
While you are down there, notice the rest of the ground: cobbles with a sheen, painted road markings, a drain with leaves stuck to the grille, gravel holding small pools. These are quiet pictures, but they hold together well as a set.
Look for the light rain creates
Rain does not produce one kind of light, it produces several, and they change fast. Watch the sky for the ten minutes when cloud thins and everything goes bright and flat at once; that is when colour is at its cleanest. Then watch for the opposite, when the sky turns the colour of a wet newspaper and shop windows become the only light source.
Windows, inside and out
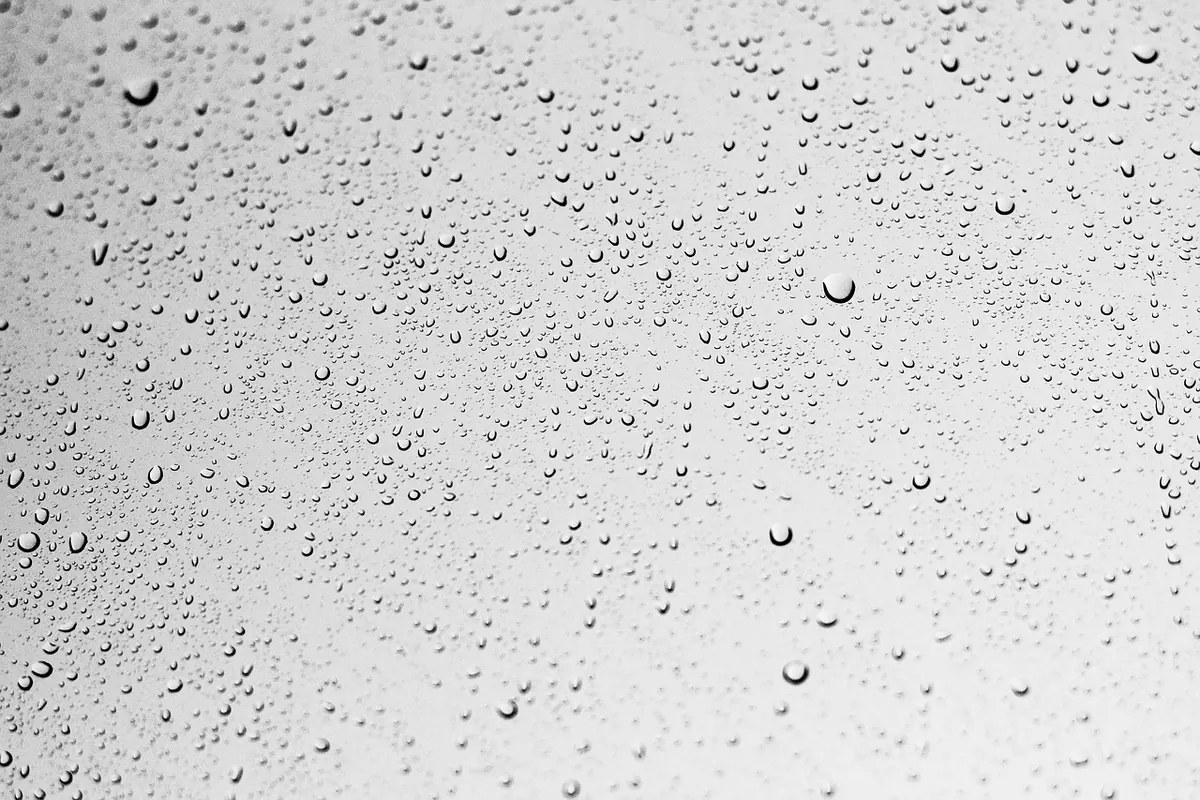
From indoors, a rainy window is a subject in itself. Focus on the glass, on a single fat droplet, and let the street blur behind it into shapes and colour. Condensation works the same way: get close, wipe a small gap with a fingertip, and photograph the world through the clearing. From outside, look for lit windows, and for the shapes of people moving behind them.
Backlight and the blue hour
Shoot towards a bright window, a streetlamp or a car headlight and falling rain becomes a scatter of bright points against the dark. It only works with a dark background, so position yourself so the wet street or a wall is behind the drops. The last half hour of daylight, with the sky still glowing and the streetlights on, is the classic combination: blue above, warm reflections below.
Expect your meter to struggle. A bright overcast sky pulls the exposure down and turns wet streets muddy; a big area of dark wet tarmac can push it the other way. Check the histogram rather than the preview, and if you are unsure, expose a little on the dark side, because reflections lose their sparkle once they clip.
A short list of rainy-day subjects
When you need an idea rather than a lecture, work down this list until something catches:
- Umbrellas seen from above: a bridge, a stairwell, a department store window.
- Bicycle saddles and railings beaded with water, shot close with a wide aperture.
- Leaves, petals and seed heads holding drops, best in flat light.
- A windscreen mid-sweep, wipers blurred, city sharp behind.
- Steam and condensation on café windows.
- People waiting under awnings, seen from the side.
- Wet steps, wet kerbs, wet signs, all shot straight on for their geometry.
- Gutters and drains with water running fast enough to blur.
- Anything with lettering, since text reflected in a puddle becomes a graphic shape.
Settings that make wet weather easier
Shutter speed decides how rain looks. Around 1/15 to 1/30 of a second, falling drops turn into faint streaks, which reads as weather rather than noise. Above roughly 1/500 they freeze into short dashes and specks. Neither is right or wrong; just know which one you are choosing.
Autofocus is the usual frustration. Rain, low contrast and reflections all confuse it, so switch to a single focus point and place it on something with an edge: the rim of a puddle, a droplet on a leaf, a painted line. Manual focus works well for window shots, where you can set the distance and simply wait for something to pass.
Keep a lens hood on even in drizzle. It shields the front element from stray drops and from light bouncing off wet surfaces. If you shoot raw, grey scenes give you more room to add contrast later without the file falling apart. And bracket a stop either way when a reflection matters, since those highlights are easy to lose.
Keep the camera dry without turning it into a project
You do not need much equipment, but a few habits make the difference between a good hour out and a repair bill.
- Put a clear filter on your lens. It takes the water, the grit and the knocks, and it is cheap to replace.
- Carry a rain cover, or a plastic bag and an elastic band. A bag over the body with a hole for the lens is not elegant and it works.
- Choose one lens before you leave and keep it on. Changing lenses outdoors in rain is how moisture and dust get inside.
- Keep two cloths: one microfibre in your pocket for the front element, one dry one sealed in a bag for later. Wipe in one direction, gently, and never rub grit across the glass.
- Let the camera hang under your coat between shots, or use an umbrella and shoot one-handed. A strap over the shoulder and the body tucked in works better than holding it out in the open.
- When you get home, leave everything in the bag to come up to room temperature slowly. Sudden warmth in a damp bag is what fogs a lens from the inside.
- If your camera is not weather sealed, treat it as if it is not. A light drizzle is one thing; a downpour is a different risk.
Phones are easier: many are rated to survive rain, though you should check your own model rather than assume, and the charging port is usually the weak point. Keep it in a pocket when you are not shooting.
Twenty minutes, one street
If you want a place to start, give yourself a small assignment rather than a walk. Pick one hundred metres of street near home and stay there for twenty minutes. Choose a theme before you begin: reflections only, or umbrellas only, or everything shot from below knee height. Take twenty pictures and delete nothing until you are back inside. Constraints like this teach you more than a whole afternoon of wandering.
Two practical notes. Watch your footing near kerbs and drain covers, and keep an eye on traffic, because drivers see less in rain than you do. Keep your bag off the wet ground, and keep your own hands warm enough to work; thin gloves that let you feel the dials are worth the bother.
Rain does not ruin photographs. It gives you a different set of them, and the streets you walk past every week will look like somewhere you have not been. Go out for half an hour, come back damp, and see what you got.
Photo: BenjaminNelan / Pixabay
Related posts
More stories you’ll love reading